Showing posts with label vegan-friendly. Show all posts
Showing posts with label vegan-friendly. Show all posts
Friday, August 27, 2010
Zucchini and tomato tian with parmesan bread crumbs

As we were sitting down to eat this, my mom said, "Don't you want to take a picture?"
"No," I said, a little grumpily. "I just want to eat."
So...this is what it looks like before the breadcrumbs and the baking.
This recipe is from Fresh, Fast, & Green; the author says that the key to a really delicious tian is letting it bake a little longer than usual so that the juices have time to carmelize. I can attest to this being completely and utterly delicious; much to my dismay, there were zero leftovers.
Extra-virgin olive oil
1 T. finely chopped fresh mint (I used 1 t. dried)
1 T. fresh orange juice
1 t. balsamic vinegar
kosher salt
12 oz zucchini (about 2 small)
1 1/2 lb small ripe tomatoes (about 5)
2 medium onions
1/2 c. fresh coarse bread crumbs (I threw one slice of bread in the blender)
3/4 c. finely grated Parmigiano-Reggiano
1 T. chopped fresh parsley
Preheat the oven to 375. Grease a shallow 2-quart gratin dish with olive oil.
Whisk together the mint, orange juice, balsamic vinegar, 1 T. oilive oil, and 1/4 t. salt. Slice the zucchini thinly (1/8 and 1/4 inch) and slightly on the diagonal. Add to the bowl and toss well. Core and slice the tomatoes crosswise a little thicker than the zucchini; arrange them on a large plate, and sprinkle with 1/4 t. salt. Let both zucchini and tomatoes sit while the onions are cooking, or at least 15 minutes. Toss the zucchini in the marinade every so often.
Meanwhile, heat 2 T. olive oil in a skillet over medium heat. Add the onions and 1/4 t. salt and cook, stirring frequently, until the onions are translucent and turn golden brown, 10-12 minutes. Transfer to the gratin dish and spread in a single layer.
Combine the bread crumbs, 2 t. olive oil, 2 T. Parmigiano, parsley, and a pinch of salt.
Drain the juices from the zucchini and tomatoes. Arrange the vegetables in rows with the slices slightly overlapping each other. Sprinkle a bit of the Parmiagiano over the zucuchini as you go. Press gently to make sure the rows are level; sprinkle any leftover Parmigiano over the vegetables and drizzle the remaining 2 T. oilive oil over them. Sprinkle the bread crumbs on top, letting the vegetables peek out a bit.
Bake until well browned all over and the juices have reduced considerably, 60 to 70 minutes (the edges of the gratin will be very dark. Cool at least 15 minutes before serving.
Friday, July 9, 2010
Zucchini stir-fry with coconut and basil

1 yellow onion, cut in half, then both halves chopped thinly into half-rings
1 yellow pepper, chopped into thin slices (I like the look of the longer slices rather than dices)
1 T. garlic
1 large zucchini, diced (or at least 2 smaller ones)
1 medium yellow squash, diced
1 handful fresh basil, chiffonaded
2/3 c. coconut milk
1 can diced pineapple, drained, juice reserved
shredded coconut for garnish
**I also used 2 T. jarred pad thai sauce for a hint of heat--I would tell you the brand but it's in Chinese so I have no clue.
extra virgin olive oil, salt, pepper to taste
Heat olive oil, then saute the zucchini and yellow squash in batches, adding salt to taste (I also added balsamic vinegar at this stage but couldn't taste it later). Remove zucchini and squash when tender, then saute the garlic for thirty seconds (I had to add more oil). Add onion and cook for 3-4 minutes, then add peppers. Continue to cook another 3-4 minutes until the peppers have begun to soften slightly. Add coconut milk and some of the pineapple juice (maybe 1/4 c.?); let sauce reduce slightly. Add diced pineapple, heat through. Serve with chiffonaded basil and coconut as garnish (although the basil really adds a lot of flavor, so don't skimp!)
Serve with brown rice (2 c. water to 1 c.rice; plan on cooking for about 40 minutes) and some delicious fruit!
Friday, June 4, 2010
Dad's whole-wheat bread

Confession: it took me about three years to get this bread just right (including lots of hovering while my dad was baking). I've found that success really depends on several things: a) the fineness of your flour b) the amount of time you knead and c) your altitude (I had to finesse it all over again when we left Utah). So if you're just beginning to bake bread and it doesn't work the first time--or the second--or the tenth--just keep trying. Bread is my very favorite thing to make, even though I've had way more bread failures than any other "genre" in the kitchen. There's just something so satisfying about turning flour and yeast and water into something so warm and welcoming, so redolent of safety and love. When I bite into a slice of bread, I can close my eyes and I'm six years old, it's Saturday night, and Dad's just pulling another loaf pan out of the oven.
Dad's recipe:
2 T. yeast
2 1/2 c. warm water (about 110 F)
2 T. sugar
2 T. oil
2 t. salt
5 c. flour (I use whole-wheat; depending on the fineness of your flour you may need to use 1 c. white to ensure a good rise)
Dissolve the yeast in warm water. Add the sugar and oil, then set aside yeast mixture until it foams up. Add flour and salt. Knead--I highly recommend using a stand mixer (I have a KitchenAid) for this. The trick is really letting it knead for a long time--longer than you'd think. I typically add 2 cups of wheat flour, let it knead for about three minutes, then add a cup of white (if I'm using it), knead for another couple of minutes, then add the rest of the flour and let it knead for another 5-10 minutes. Bread dough made with whole-wheat will be stickier than doughs made with white flour, so don't keep adding flour until it's totally balled up on the hook like you would for a white-flour dough. HOWEVER, it should not be a wet slush. As you get more experienced, you'll develop more of an eye and a feel for how the dough should look/feel when it's finished.
Let rise to double (about 45 minutes if you're using instant yeast). Knead again, form into longish ovals and put into greased and floured loaf pans. Let rise again (I just do the second rise while the oven is heating, about 10 minutes), then bake at 350 for 35 minutes. Immediately remove from pans, let cool on rack until cool enough to serve (if you cut it too soon, it will crumble apart--but if you wait too long, it won't melt butter. You decide where you want to cut on this continuum! I usually wait about five minutes and figure if it crumbles, it crumbles).
A couple of other notes:
- If you let the dough rise too long, it will fall and look a little deflated. This means your final loaf won't rise as well.
- On that note, there's a little thing called "oven spring" which means your dough will continue to rise slightly once you put it in the oven. I let my second rise go until the dough is peeking over the top of the loaf pan, then put it in.
- My dad's recipe is formulated for smaller loaf pans than they sell now. What I generally do (for one loaf of bread) is adjust this recipe so I'm making (roughly) a 3/4 amount. This is just right for my pans to get one good-sized loaf. So I use 1 3/4 c. water, 1 3/4 T. yeast, etc.
- I have an Ultramill, which is the kind of mill that grinds a #10 can of wheat into flour in about two minutes. Super fast, but a coarser grind than my dad's stone mill. This also impacts rise. Again, this is part of why I plan to make more dough per pan. EDIT: I'm now using a Nutrimill, which is much much better and gives a finer flour that doesn't need the addition of any white)
- For a whole-wheat dough, use cool water on your hands rather than flour (as you would for a white-flour dough) as you're shaping the dough into a loaf.
- If you don't like whole-wheat bread, this also works really beautifully with all white flour.
PLEASE feel free to ask questions!! This is something that's a little difficult to convey without a nice lump of dough in my hand and you standing next to me at the counter. :-) And if you're local, shoot me an email and we'll find a time when you can come over and we'll make bread together, because it's much easier to learn hands-on.
Friday, May 14, 2010
Roast Garlic Soup
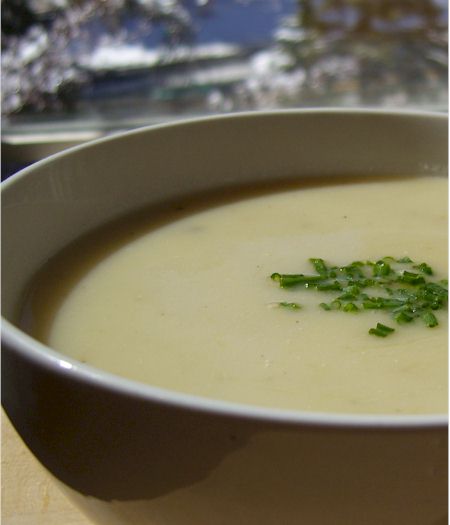
This soup comes from Martha Stewart Living. Despite the large quantity of garlic, this soup is a mellow velvety broth (picky eater-approved!). It makes an elegant first course for a fancy meal; alternately, pair it with a loaf of crusty bread and a green salad for a weeknight meal that requires only minutes of prep time. I like to snip fresh chives over the top to give it a little extra pizazz.
Roast Garlic Soup
serves 4
2 garlic bulbs, cloves separated (about 40)
1 large russet potato (12 oz), peeled and cut into 1/2 inch cubes
1 large yellow onion (12 oz), trimmed, peeled, and cut into wedges
1 1/2 t. ground sage
1 T. olive oil
1 1/2 t. coarse salt
freshly ground pepper
1/3 c. apple juice (or sherry if you prefer)
3 1/2 c. chicken or vegetable stock
1 t. lemon juice
Preheat oven to 400. Toss whole garlic cloves, potato, onion, sage, oil, 1 t. salt, and a pinch of pepper in a large ovenproof skillet or dish. Cover and transfer to oven. Roast, stirring occasionally, 30 minutes. (I use a Corningware baking dish for the oven step and then transfer to a stockpot for the stovetop steps.)
Remove pan from oven; stir in 1/3 c. water. Cover, return to oven, and roast until potato is deep gold brown and garlic and onion are very soft (about 30 minutes). Transfer garlic cloves to a plate, let cool slightly. Squeeze garlic from skins into skillet; discard skins.
Heat skillet over medium-high heat. Add sherry or juice and cook, stirring to scrape up browned bits (this is where the flavor is!) about 1 minute. Add stock and 1/2 c. water, bring to a simmer. Remove from heat and let cool slightly.
Puree soup in a blender in batches, or use an immersion blender in the dish itself (my preferred method). Heat over low heat; stir in lemon juice and remaining 1/2 t. salt, and 1/4 t. pepper.
Friday, April 23, 2010
Dijon Fruited Salad
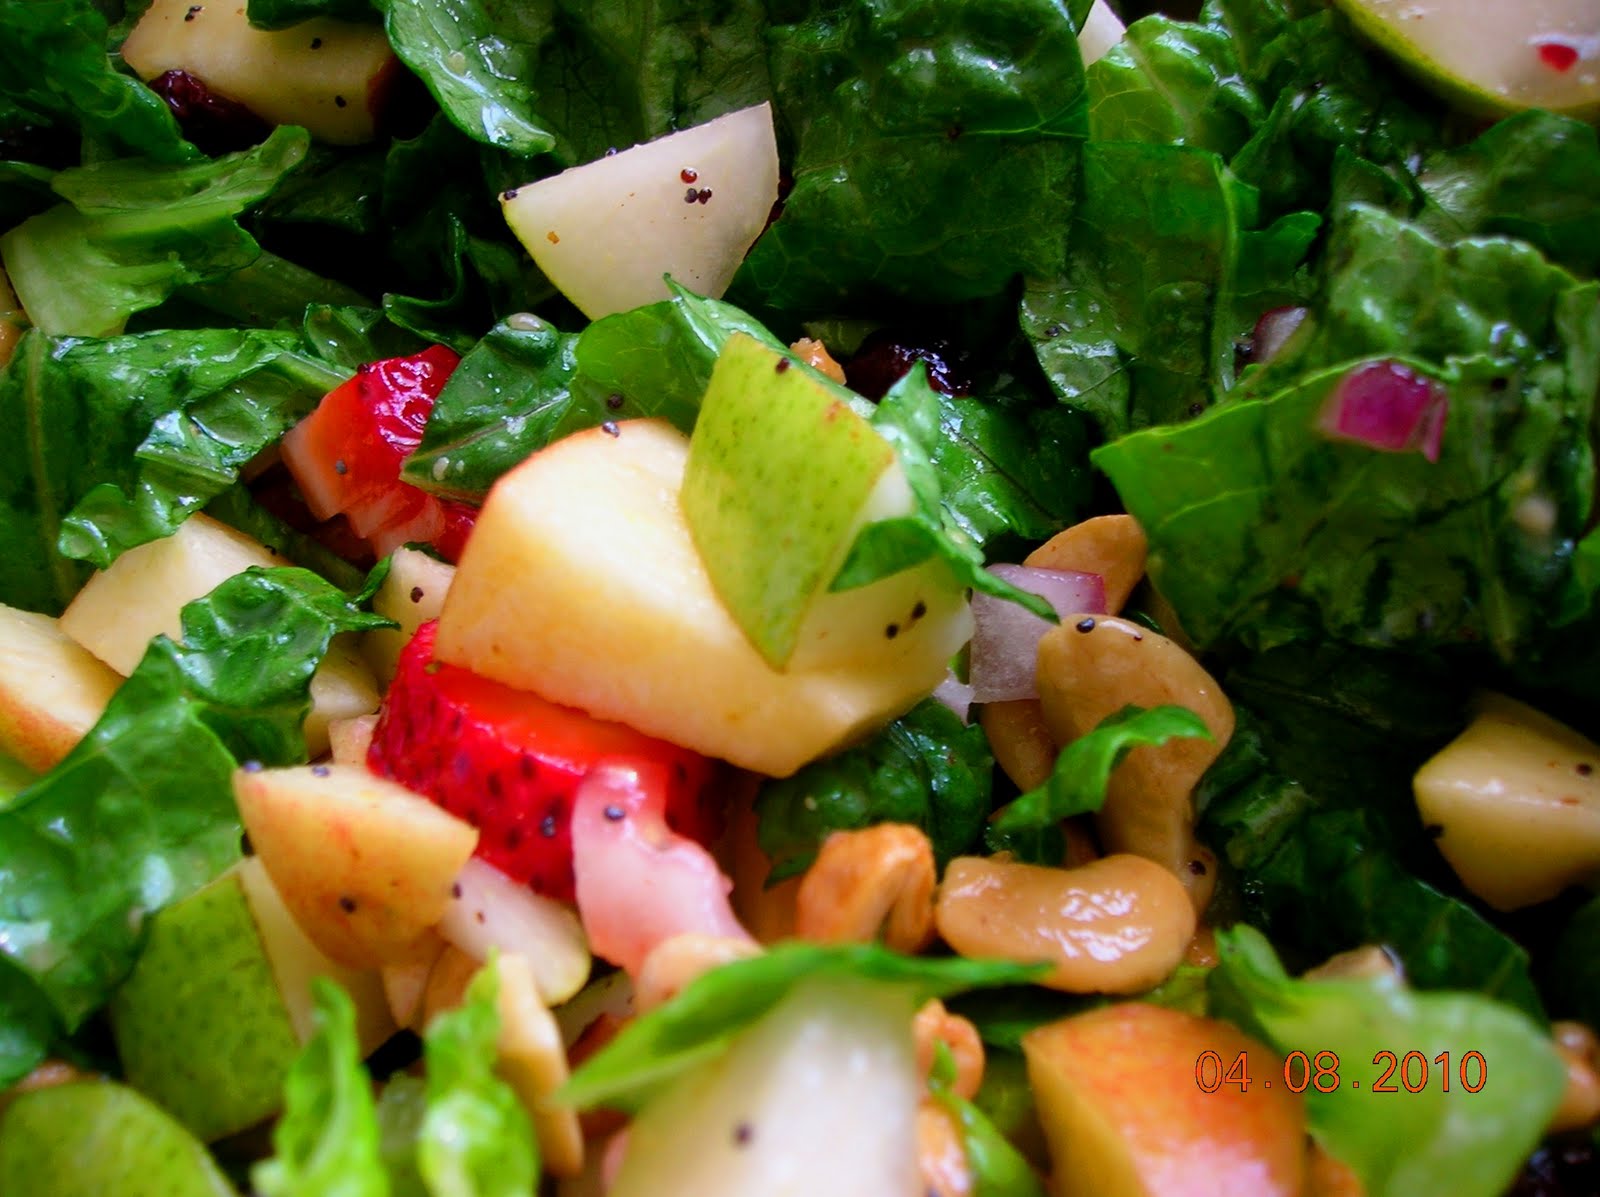
The original recipe comes from my sister Ruth's mother-in-law, Adrienne. She served it at Ruth's bridal shower and I ate three plates of this salad (I think everyone else at my table did as well!) It was SO good. Adrienne says that the salad was originally made without chicken; the recipe that I have includes 2 lbs of cooked diced chicken, which I generally leave out, but if you're a meat-eater and you want this to be more substantial, I would recommend baking a couple of chicken breasts (350 for 35 minutes), then dicing and adding to the salad after the chicken has been chilled.
Dijon Fruited Salad
Dressing (prepare and refrigerate overnight; I toss everything in a pint jar and shake vigorously):
1/2 c. sugar
1/3 c. lemon juice
2 T. Dijon mustard
1 T. poppy seeds
3/4 c. oil
1/2 t. salt
2 T. finely chopped red onion
Salad:
2 heads chopped romaine lettuce
2 unpeeled diced red apples
2 unpeeled diced pears (rinse diced fruit in lemon juice to prevent browning)
1 1/2 c. cashews
1 c. dried cranberries
1 c. shredded mozzarella (I generally leave this out these days...but it's really tasty. :-)
**2-3 diced avocadoes
**1 lb sliced strawberries
**not in original recipe but extremely tasty additions!!
Thursday, April 8, 2010
Oven-roasted vegetables

This is a dish that usually makes a weekly appearance at our house. It varies depending on what I have on hand and what's in season (it's an excellent use-it-up recipe as well!) I usually make more than I think we'll eat and use the leftovers in other dishes later; for instance, you could layer the roasted vegetables in a lasagna, toss with pasta, etc.
**Ingredients may vary--use what you like! The following recipe is what's pictured and what I had that day. All ingredients, except when otherwise noted, should be cut into bite-sized pieces
1 lb asparagus
3 medium-sized red potatoes
1 eggplant
1 large onion, cut in wedges
3 carrots, peeled
3/4 lb mushrooms
**other favorite ingredients: summer squashes/parsnips/garlic/peppers/winter squashes would probably be good, but I haven't tried them--sweet potatoes would probably work well too!
Toss chopped vegetables together in a large bowl with extra-virgin olive oil to taste (the more you put in, the better it will be; I never measure so I'm guessing I usually put in 1/4 cup? Or maybe just a couple of tablespoons?) Season with salt and pepper to taste. I also like to add rosemary.
Preheat oven to 425; divide vegetables evenly between rimmed baking sheets in a single layer. Roast for 25 minutes. Serve warm.
Friday, March 26, 2010
Roasted portobello mushrooms

These thick, meaty mushrooms are divine sandwiched between slices of focaccia with a bit of avocado and red onion dressing. If I'm serving this alongside a spinach salad (the one picture here also includes oranges, pecans, dried cranberries, and avocado), I'll often put some salad in with the mushroom. Alternatively, you could slice the mushroom and serve it atop the salad!
This recipe comes straight from Veganomicon.
Marinade:
1/2 c. cooking wine (I use white grape or apple juice)
1 T. olive oil
2 T. soy sauce
2 T. balsamic vinegar
2 cloves garlic, minced
2 large or up to 4 small portobello caps.
Combine all ingredients in a glass pie plate. Place the mushrooms caps-up in the marinade and spoon marinade liberally into each cap to form a small pool. Marinate for 20 minutes; cover with aluminum foil and bake at 400 for 30 minutes. Remove the foil, flip the caps over, and cook, uncovered, for another 10 minutes.
Subscribe to:
Posts (Atom)