Friday, June 11, 2010

Panini with grilled zucchini and mushroom-chive mayonnaise

A note on panini breads: you can buy or make foccacia or ciabatta rolls, which are the traditional choices for panini. We have also had great success with sourdough, light rye, and--believe it or not--thinly sliced bagels (pictured). If you don't have a panini press, seriously consider acquiring one, as they're fairly inexpensive--I use mine constantly.  My children (even the mushroom-hater) love this sandwich, so that's a definite plus for any quick meal!

This recipe comes from the book
Panini Express--which I love. 
Mushroom mayonnaise
8 oz white button mushrooms, wiped clean and finely minced
1 t. chopped fresh chives
3 T. mayonnaise
2 t. lemon juice
salt and pepper to taste

For the sandwich
2 zucchini (you could also add in an eggplant; treat it exactly as you would the zucchini--I love grilled eggplant and I save the leftovers to use on pizza)
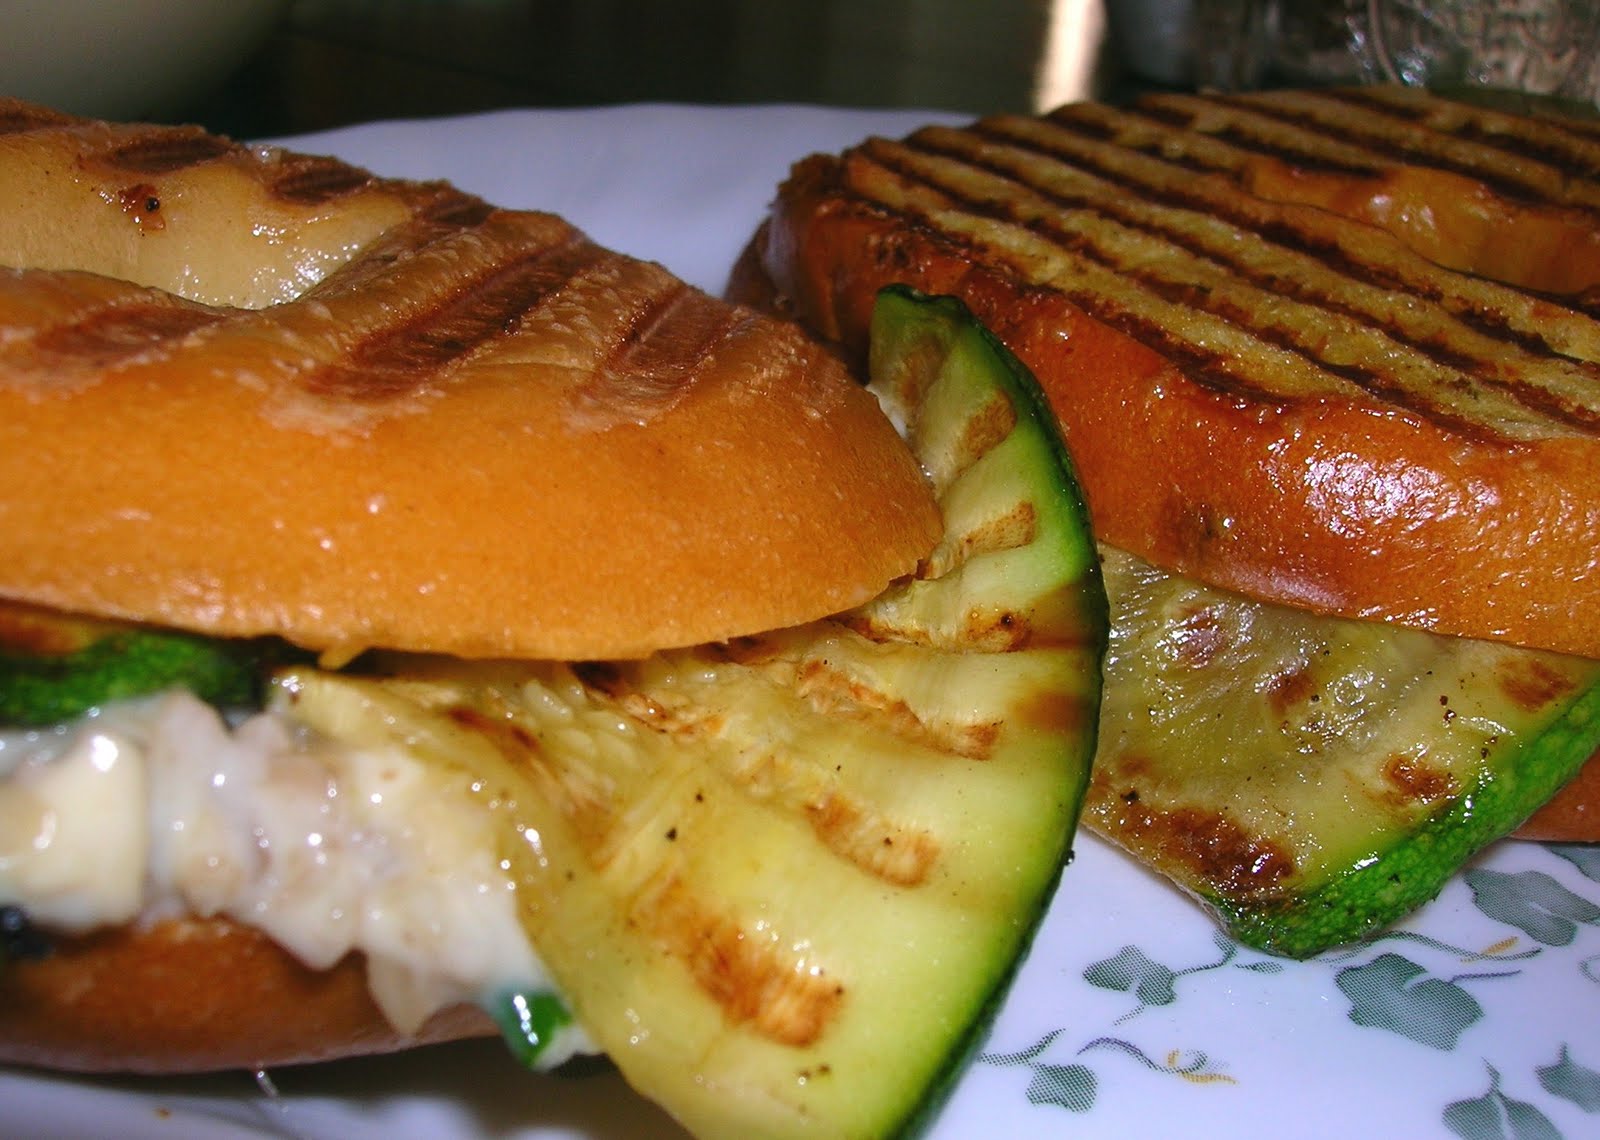
White cheese (we've used provolone, Swiss, mozzarella, Monterey Jack, and Gouda with equal enjoyment on this particular sandwich.  Gouda is pictured.)

Saute the mushrooms in olive oil until they begin to release their juices (2 minutes).  Sprinkle with the lemon juice and continue to cook another 3-4 minutes until they're brown (brown as in cooked down, not brown as in getting crunchy and burned).  Remove from pan and let cool, then mix in mayonnaise, chives, and salt/pepper.

Slice zucchini (or eggplant) lengthwise in 1/4 inch thick strips.  Brush each side with olive oil (I simply use spray olive oil from a can--less mess!) and sprinkle with salt and pepper.  Grill on a panini press until browned and softened, approximately 5 minutes.

Compose the sandwich by spreading mushroom mayonnaise on one slice of bread, layering in the zucchini, then topping with the cheese and another slice of bread.  Grill on the press until browned and golden, approximately 3-5 minutes, depending on your press.

Friday, June 4, 2010

Dad's whole-wheat bread


Confession:  it took me about three years to get this bread just right (including lots of hovering while my dad was baking).  I've found that success really depends on several things:  a) the fineness of your flour b) the amount of time you knead and c) your altitude (I had to finesse it all over again when we left Utah).  So if you're just beginning to bake bread and it doesn't work the first time--or the second--or the tenth--just keep trying.   Bread is my very favorite thing to make, even though I've had way more bread failures than any other "genre" in the kitchen.  There's just something so satisfying about turning flour and yeast and water into something so warm and welcoming, so redolent of safety and love.  When I bite into a slice of bread, I can close my eyes and I'm six years old, it's Saturday night, and Dad's just pulling another loaf pan out of the oven. 

Dad's recipe:
2 T. yeast
2 1/2 c. warm water (about 110 F)
2 T. sugar
2 T. oil
2 t. salt
5 c. flour (I use whole-wheat; depending on the fineness of your flour you may need to use 1 c. white to ensure a good rise)

Dissolve the yeast in warm water.  Add the sugar and oil, then set aside yeast mixture until it foams up.  Add flour and salt.  Knead--I highly recommend using a stand mixer (I have a KitchenAid) for this.  The trick is really letting it knead for a long time--longer than you'd think.  I typically add 2 cups of wheat flour, let it knead for about three minutes, then add a cup of white (if I'm using it), knead for another couple of minutes, then add the rest of the flour and let it knead for another 5-10 minutes.  Bread dough made with whole-wheat will be stickier than doughs made with white flour, so don't keep adding flour until it's totally balled up on the hook like you would for a white-flour dough. HOWEVER, it should not be a wet slush. As you get more experienced, you'll develop more of an eye and a feel for how the dough should look/feel when it's finished.
Let rise to double (about 45 minutes if you're using instant yeast).  Knead again, form into longish ovals and put into greased and floured loaf pans.  Let rise again (I just do the second rise while the oven is heating, about 10 minutes), then bake at 350 for 35 minutes.  Immediately remove from pans, let cool on rack until cool enough to serve (if you cut it too soon, it will crumble apart--but if you wait too long, it won't melt butter.  You decide where you want to cut on this continuum!  I usually wait about five minutes and figure if it crumbles, it crumbles). 

A couple of other notes:
  • If you let the dough rise too long, it will fall and look a little deflated.  This means your final loaf won't rise as well.
  • On that note, there's a little thing called "oven spring" which means your dough will continue to rise slightly once you put it in the oven.  I let my second rise go until the dough is peeking over the top of the loaf pan, then put it in.
  • My dad's recipe is formulated for smaller loaf pans than they sell now.  What I generally do (for one loaf of bread) is adjust this recipe so I'm making (roughly) a 3/4 amount.  This is just right for my pans to get one good-sized loaf.  So I use 1 3/4 c. water,  1 3/4 T. yeast, etc. 
  • I have an Ultramill, which is the kind of mill that grinds a #10 can of wheat into flour in about two minutes.  Super fast, but a coarser grind than my dad's stone mill.  This also impacts rise.  Again, this is part of why I plan to make more dough per pan.  EDIT:  I'm now using a Nutrimill, which is much much better and gives a finer flour that doesn't need the addition of any white)
  • For a whole-wheat dough, use cool water on your hands rather than flour (as you would for a white-flour dough) as you're shaping the dough into a loaf.
  • If you don't like whole-wheat bread, this also works really beautifully with all white flour. 


    PLEASE feel free to ask questions!!  This is something that's a little difficult to convey without a nice lump of dough in my hand and you standing next to me at the counter.   :-)  And if you're local, shoot me an email and we'll find a time when you can come over and we'll make bread together, because it's much easier to learn hands-on.