This dish was designed to use up one of those monster zucchini--so don't hesitate if you've got one lurking on your counter! Young, tender zucchini would work equally well, but I am forever forgetting to pick zucchini when they're lovely and petite.
1 yellow onion, cut in half, then both halves chopped thinly into half-rings
1 yellow pepper, chopped into thin slices (I like the look of the longer slices rather than dices)
1 T. garlic
1 large zucchini, diced (or at least 2 smaller ones)
1 medium yellow squash, diced
1 handful fresh basil, chiffonaded
2/3 c. coconut milk
1 can diced pineapple, drained, juice reserved
shredded coconut for garnish
**I also used 2 T. jarred pad thai sauce for a hint of heat--I would tell you the brand but it's in Chinese so I have no clue.
extra virgin olive oil, salt, pepper to taste
Heat olive oil, then saute the zucchini and yellow squash in batches, adding salt to taste (I also added balsamic vinegar at this stage but couldn't taste it later). Remove zucchini and squash when tender, then saute the garlic for thirty seconds (I had to add more oil). Add onion and cook for 3-4 minutes, then add peppers. Continue to cook another 3-4 minutes until the peppers have begun to soften slightly. Add coconut milk and some of the pineapple juice (maybe 1/4 c.?); let sauce reduce slightly. Add diced pineapple, heat through. Serve with chiffonaded basil and coconut as garnish (although the basil really adds a lot of flavor, so don't skimp!)
Serve with brown rice (2 c. water to 1 c.rice; plan on cooking for about 40 minutes) and some delicious fruit!
Friday, July 9, 2010
Friday, June 11, 2010
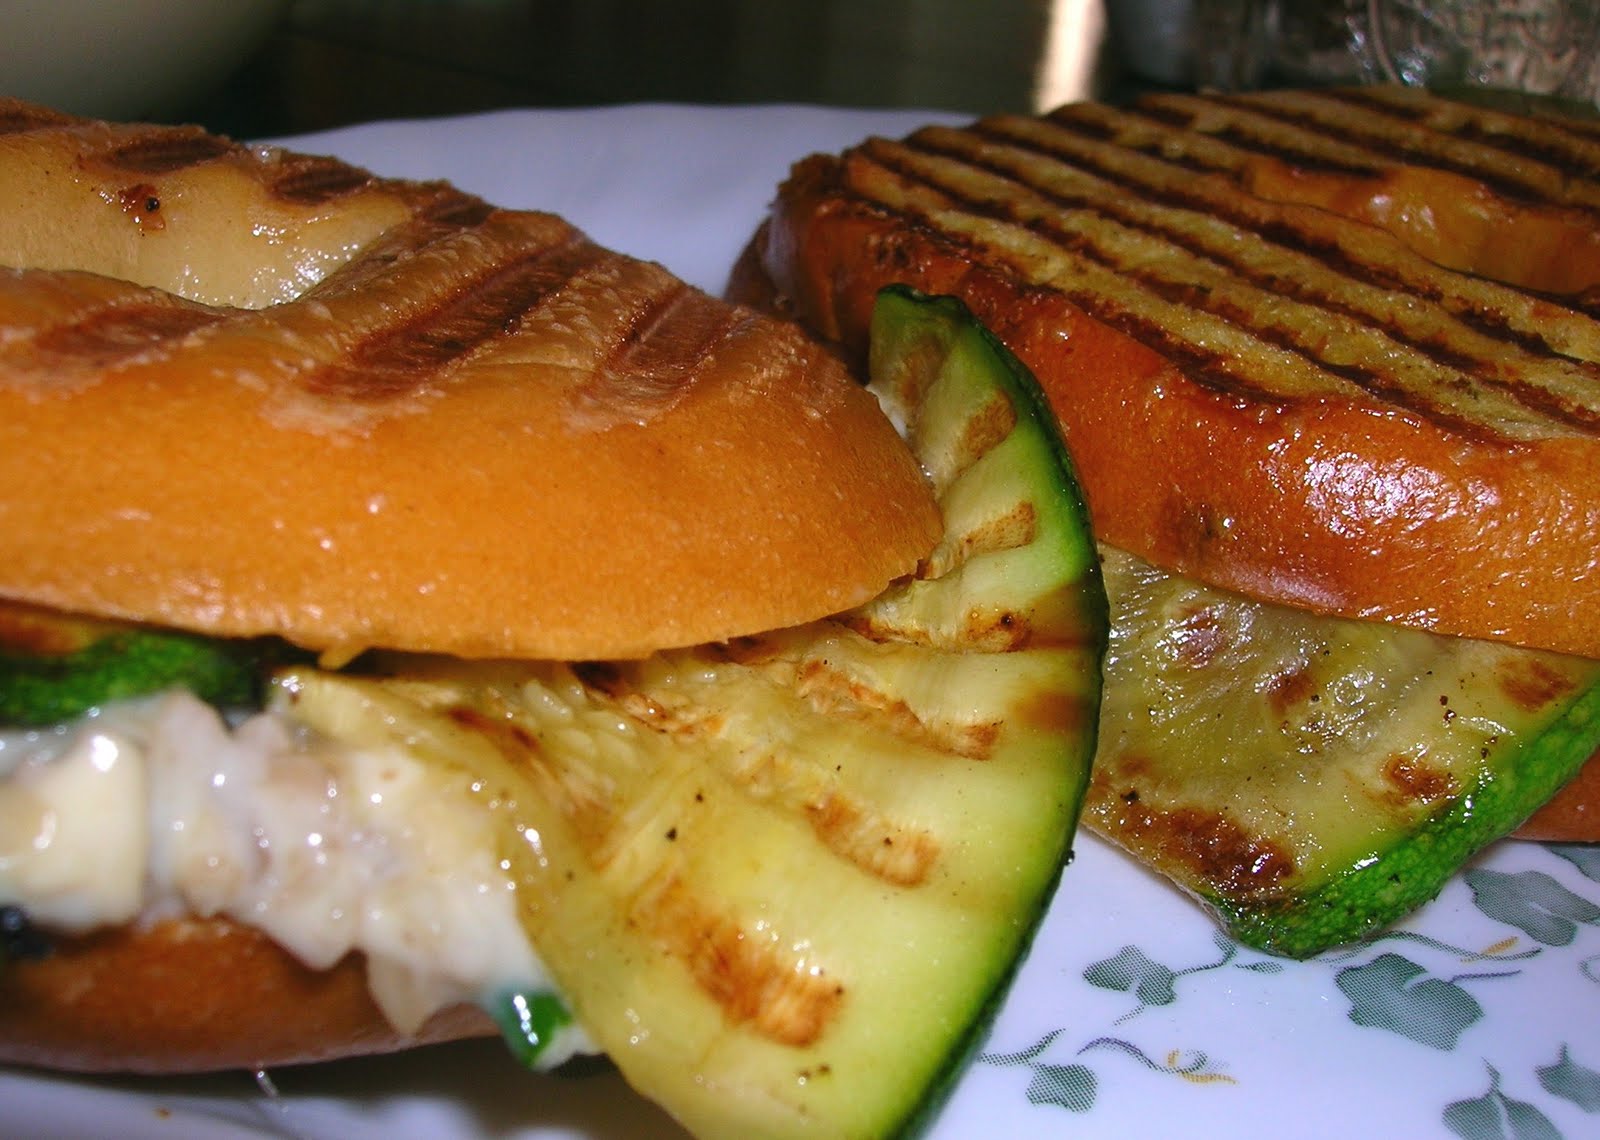
Panini with grilled zucchini and mushroom-chive mayonnaise
A note on panini breads: you can buy or make foccacia or ciabatta rolls, which are the traditional choices for panini. We have also had great success with sourdough, light rye, and--believe it or not--thinly sliced bagels (pictured). If you don't have a panini press, seriously consider acquiring one, as they're fairly inexpensive--I use mine constantly. My children (even the mushroom-hater) love this sandwich, so that's a definite plus for any quick meal!
This recipe comes from the book Panini Express--which I love.
Mushroom mayonnaise
8 oz white button mushrooms, wiped clean and finely minced
1 t. chopped fresh chives
3 T. mayonnaise
2 t. lemon juice
salt and pepper to taste
For the sandwich
2 zucchini (you could also add in an eggplant; treat it exactly as you would the zucchini--I love grilled eggplant and I save the leftovers to use on pizza)
White cheese (we've used provolone, Swiss, mozzarella, Monterey Jack, and Gouda with equal enjoyment on this particular sandwich. Gouda is pictured.)
Saute the mushrooms in olive oil until they begin to release their juices (2 minutes). Sprinkle with the lemon juice and continue to cook another 3-4 minutes until they're brown (brown as in cooked down, not brown as in getting crunchy and burned). Remove from pan and let cool, then mix in mayonnaise, chives, and salt/pepper.
Slice zucchini (or eggplant) lengthwise in 1/4 inch thick strips. Brush each side with olive oil (I simply use spray olive oil from a can--less mess!) and sprinkle with salt and pepper. Grill on a panini press until browned and softened, approximately 5 minutes.
Compose the sandwich by spreading mushroom mayonnaise on one slice of bread, layering in the zucchini, then topping with the cheese and another slice of bread. Grill on the press until browned and golden, approximately 3-5 minutes, depending on your press.
This recipe comes from the book Panini Express--which I love.
Mushroom mayonnaise
8 oz white button mushrooms, wiped clean and finely minced
1 t. chopped fresh chives
3 T. mayonnaise
2 t. lemon juice
salt and pepper to taste
For the sandwich
2 zucchini (you could also add in an eggplant; treat it exactly as you would the zucchini--I love grilled eggplant and I save the leftovers to use on pizza)
White cheese (we've used provolone, Swiss, mozzarella, Monterey Jack, and Gouda with equal enjoyment on this particular sandwich. Gouda is pictured.)
Saute the mushrooms in olive oil until they begin to release their juices (2 minutes). Sprinkle with the lemon juice and continue to cook another 3-4 minutes until they're brown (brown as in cooked down, not brown as in getting crunchy and burned). Remove from pan and let cool, then mix in mayonnaise, chives, and salt/pepper.
Slice zucchini (or eggplant) lengthwise in 1/4 inch thick strips. Brush each side with olive oil (I simply use spray olive oil from a can--less mess!) and sprinkle with salt and pepper. Grill on a panini press until browned and softened, approximately 5 minutes.
Compose the sandwich by spreading mushroom mayonnaise on one slice of bread, layering in the zucchini, then topping with the cheese and another slice of bread. Grill on the press until browned and golden, approximately 3-5 minutes, depending on your press.
Friday, June 4, 2010
Dad's whole-wheat bread
Confession: it took me about three years to get this bread just right (including lots of hovering while my dad was baking). I've found that success really depends on several things: a) the fineness of your flour b) the amount of time you knead and c) your altitude (I had to finesse it all over again when we left Utah). So if you're just beginning to bake bread and it doesn't work the first time--or the second--or the tenth--just keep trying. Bread is my very favorite thing to make, even though I've had way more bread failures than any other "genre" in the kitchen. There's just something so satisfying about turning flour and yeast and water into something so warm and welcoming, so redolent of safety and love. When I bite into a slice of bread, I can close my eyes and I'm six years old, it's Saturday night, and Dad's just pulling another loaf pan out of the oven.
Dad's recipe:
2 T. yeast
2 1/2 c. warm water (about 110 F)
2 T. sugar
2 T. oil
2 t. salt
5 c. flour (I use whole-wheat; depending on the fineness of your flour you may need to use 1 c. white to ensure a good rise)
Dissolve the yeast in warm water. Add the sugar and oil, then set aside yeast mixture until it foams up. Add flour and salt. Knead--I highly recommend using a stand mixer (I have a KitchenAid) for this. The trick is really letting it knead for a long time--longer than you'd think. I typically add 2 cups of wheat flour, let it knead for about three minutes, then add a cup of white (if I'm using it), knead for another couple of minutes, then add the rest of the flour and let it knead for another 5-10 minutes. Bread dough made with whole-wheat will be stickier than doughs made with white flour, so don't keep adding flour until it's totally balled up on the hook like you would for a white-flour dough. HOWEVER, it should not be a wet slush. As you get more experienced, you'll develop more of an eye and a feel for how the dough should look/feel when it's finished.
Let rise to double (about 45 minutes if you're using instant yeast). Knead again, form into longish ovals and put into greased and floured loaf pans. Let rise again (I just do the second rise while the oven is heating, about 10 minutes), then bake at 350 for 35 minutes. Immediately remove from pans, let cool on rack until cool enough to serve (if you cut it too soon, it will crumble apart--but if you wait too long, it won't melt butter. You decide where you want to cut on this continuum! I usually wait about five minutes and figure if it crumbles, it crumbles).
A couple of other notes:
- If you let the dough rise too long, it will fall and look a little deflated. This means your final loaf won't rise as well.
- On that note, there's a little thing called "oven spring" which means your dough will continue to rise slightly once you put it in the oven. I let my second rise go until the dough is peeking over the top of the loaf pan, then put it in.
- My dad's recipe is formulated for smaller loaf pans than they sell now. What I generally do (for one loaf of bread) is adjust this recipe so I'm making (roughly) a 3/4 amount. This is just right for my pans to get one good-sized loaf. So I use 1 3/4 c. water, 1 3/4 T. yeast, etc.
- I have an Ultramill, which is the kind of mill that grinds a #10 can of wheat into flour in about two minutes. Super fast, but a coarser grind than my dad's stone mill. This also impacts rise. Again, this is part of why I plan to make more dough per pan. EDIT: I'm now using a Nutrimill, which is much much better and gives a finer flour that doesn't need the addition of any white)
- For a whole-wheat dough, use cool water on your hands rather than flour (as you would for a white-flour dough) as you're shaping the dough into a loaf.
- If you don't like whole-wheat bread, this also works really beautifully with all white flour.
PLEASE feel free to ask questions!! This is something that's a little difficult to convey without a nice lump of dough in my hand and you standing next to me at the counter. :-) And if you're local, shoot me an email and we'll find a time when you can come over and we'll make bread together, because it's much easier to learn hands-on.
Friday, May 21, 2010
Grilled lemon artichokes with spinach and fettucine
I used fresh artichokes to make this recipe because that's what I had on hand; you could also use canned artichoke hearts to shorten the prep time, but they won't have the smoky depth of flavor that you get from grilling fresh artichokes. For more information about preparing the artichokes for cooking, go here. Basically, you need to get rid of all the poky parts; you'll know if you missed any because you'll stab your fingers and it will hurt way out of proportion.
1 lb baby artichokes, trimmed and stemmed, with outer petals removed
5 oz fresh spinach
8 oz fettucine noodles
fresh Parmesan cheese
Dressing:
1/4 c. lemon juice
1/4 c. olive oil
1 T. Dijon mustard
Heat up your grill (I used my panini press so I wouldn't lose any artichokes through the barbeque grill grate, since they sort of fell apart as I was preparing them. You could also use a George Foreman or other countertop grill. But seriously--I love my panini press and I use it to grill constantly, not just for paninis...so think about getting one. :-)
Boil prepared artichokes until fork-tender, approximately 10 minutes. Drain artichokes and immerse immediately in cold water to prevent further cooking. Drain again once they've cooled; toss with olive oil, salt, and pepper (I use a Ziploc bag for this and just dump everything in together so I can be sure things are evenly coated). Grill artichokes for about five minutes or until they're visibly browned.
Start cooking your pasta.
Toss the artichokes with the dressing and let sit for half an hour or so, if possible (or you can just eat right away). Toss with cooked pasta, several generous handfuls of torn-up spinach, and another generous handful or two of fresh Parmesan. Voila!
Friday, May 14, 2010
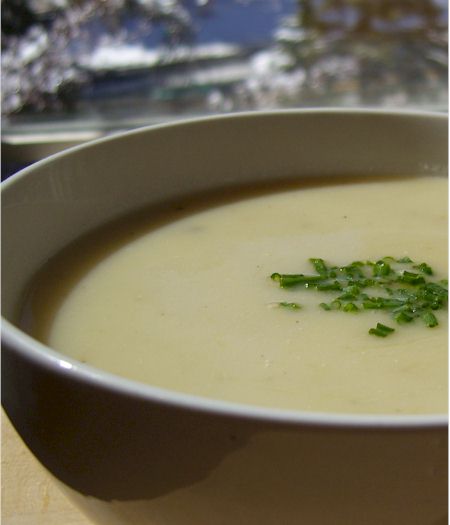
Roast Garlic Soup
This soup comes from Martha Stewart Living. Despite the large quantity of garlic, this soup is a mellow velvety broth (picky eater-approved!). It makes an elegant first course for a fancy meal; alternately, pair it with a loaf of crusty bread and a green salad for a weeknight meal that requires only minutes of prep time. I like to snip fresh chives over the top to give it a little extra pizazz.
Roast Garlic Soup
serves 4
2 garlic bulbs, cloves separated (about 40)
1 large russet potato (12 oz), peeled and cut into 1/2 inch cubes
1 large yellow onion (12 oz), trimmed, peeled, and cut into wedges
1 1/2 t. ground sage
1 T. olive oil
1 1/2 t. coarse salt
freshly ground pepper
1/3 c. apple juice (or sherry if you prefer)
3 1/2 c. chicken or vegetable stock
1 t. lemon juice
Preheat oven to 400. Toss whole garlic cloves, potato, onion, sage, oil, 1 t. salt, and a pinch of pepper in a large ovenproof skillet or dish. Cover and transfer to oven. Roast, stirring occasionally, 30 minutes. (I use a Corningware baking dish for the oven step and then transfer to a stockpot for the stovetop steps.)
Remove pan from oven; stir in 1/3 c. water. Cover, return to oven, and roast until potato is deep gold brown and garlic and onion are very soft (about 30 minutes). Transfer garlic cloves to a plate, let cool slightly. Squeeze garlic from skins into skillet; discard skins.
Heat skillet over medium-high heat. Add sherry or juice and cook, stirring to scrape up browned bits (this is where the flavor is!) about 1 minute. Add stock and 1/2 c. water, bring to a simmer. Remove from heat and let cool slightly.
Puree soup in a blender in batches, or use an immersion blender in the dish itself (my preferred method). Heat over low heat; stir in lemon juice and remaining 1/2 t. salt, and 1/4 t. pepper.
Friday, May 7, 2010
artisanal-style pizza
This is honestly the best pizza I've ever had in my life. The original recipe comes from Pizzeria Bianco in Phoenix via May 2009's Martha Stewart Living. This recipe has a delicate crumb and a perfectly crunchy crust--use a preheated baking stone for best results. And I'll be honest with you--you need toppings that are worthy of this crust! We have also found that this works very well if you refrigerate it after the first rise, making a perfect choice if you have afternoon church--just divide, cover with plastic wrap, and stick in the fridge, then take it out when you get home while the oven heats up.
Dough (makes 4 12-inch pizzas)
2 1/4 t. active dry yeast
2 c. warm water (105 to 115 degrees F)
5 to 5 1/2 c. all-purpose flour
2 t. fine sea salt
Extra-virgin olive oil, for greasing bowl
**scroll down for topping suggestions**
Dissolve yeast in warm water, let stand for 5 minutes. Stir in 3 c. flour and the salt, stirring until smooth. Stir in additional 2 c. flour, adding flour (up to 1/2 c.) 1 T. at a time, stirring until dough comes away from bowl but is still sticky (I use my KitchenAid stand mixer for all this).
Turn dough out of bowl and onto a lightly floured surface, kneading with floured hands. Fold the dough back over itself, repeating until it's easily to handle and less sticky, about ten times. Knead normally until dough is smooth, elastic, and soft, but still a little tacky, about 10 minutes.
Shape dough into a ball and transfer to a lightly oiled bowl; turn to coat. Cover with plastic, let rise in a warm place until it doubles in volume (2-3 hours; when pressed with finger the indent should remain).
Place pizza stone in oven and preheat to 500 for an hour. Scrape dough out of bowl onto floured surface, cut into 4 pieces, and shape into balls. Dust with flour, and cover with plastic. Let rest 20-30 minutes until dough relaxes and almost doubles. Turn over a baking sheet (we like jelly roll pans) and cover it liberally with cornmeal.
Holding top edge of 1 dough ball in both hands, let bottom edge touch work surface. Carefully move hands around edge to form a circle, as if turning a wheel. Hold dough on back of your hand, letting its weight stretch into a 12-inch round (Neil likes to toss it at this point, but I always ruin it, so if he's not home I just stretch it).
Transfer dough to inverted baking sheet (on cornmeal side). Arrange toppings, then carefully slide the dough off the baking sheet and onto the hot stone. We find that this generally requires two people with metal spatulas (see picture). Bake pizza for 12 minutes or until crust is crisp and golden brown; remove from oven with peel and serve hot!
Toppings:
Our favorite combination (pictured) is pesto, grilled eggplant (brush cut eggplant with olive oil, sprinkle with kosher salt and freshly ground pepper, grill on panini press or George Foreman-style grill for 4-5 minutes or until done), red onion rings, shaved Parmesan, and black olives. In summer, we add thick slices of heirloom tomatoes (Brandywine is our favorite). We also make one with olives, peppers, onions, and mushrooms for the kids, who aren't crazy about eggplant. Our favorite jarred sauce is Classico Traditional Sweet Basil.
other suggestions from the MS Living article:
- tomato sauce, fresh mozzarella, basil
- tomato sauce, oregano, garlic
- tomato sauce, fresh mozzarella, gaeta olives, salami
- fresh mozzarella, ricotta, parmigiano-reggiano, arugula
- parmigiano-reggiano, red onion, rosemary, pistachios
- smoked mozzarella, fennel sausage, oven-roasted onion
- fresh mozzarella, mortadella, garlic
- heirloom tomatoes, pecorino, dried oregano, pancetta
Friday, April 23, 2010
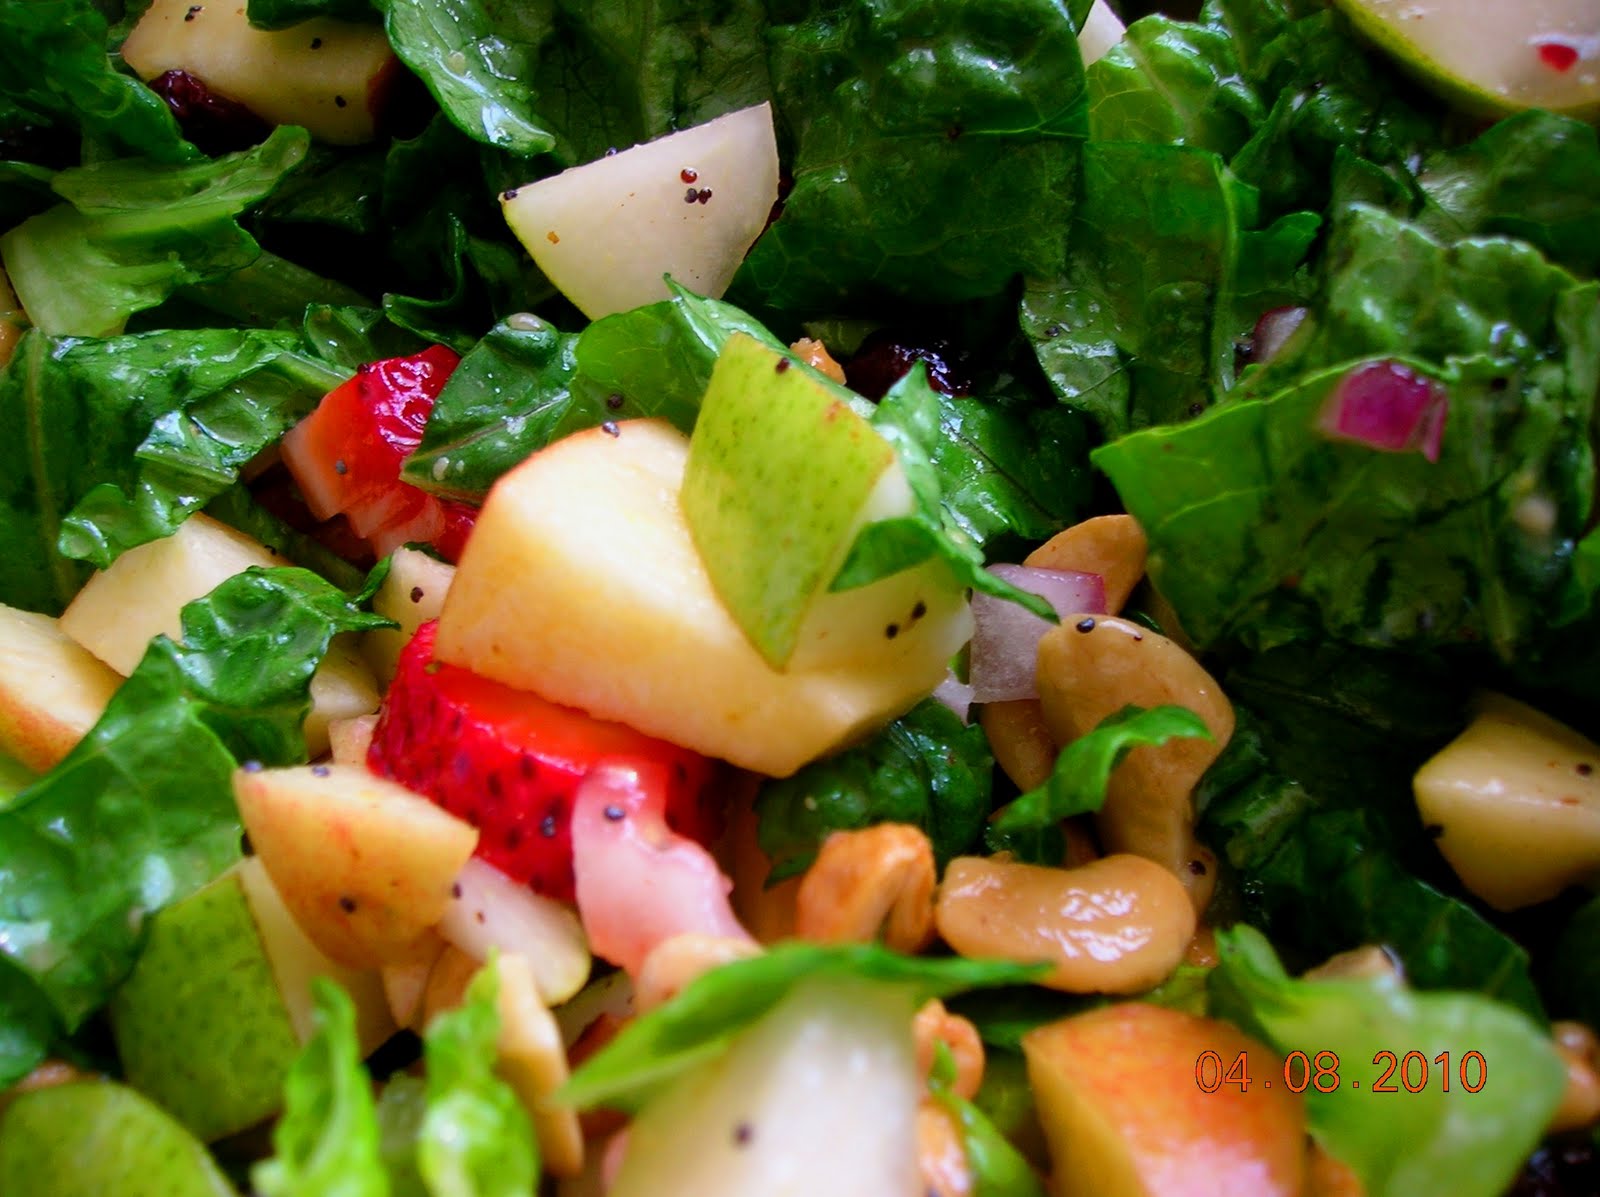
Dijon Fruited Salad
The original recipe comes from my sister Ruth's mother-in-law, Adrienne. She served it at Ruth's bridal shower and I ate three plates of this salad (I think everyone else at my table did as well!) It was SO good. Adrienne says that the salad was originally made without chicken; the recipe that I have includes 2 lbs of cooked diced chicken, which I generally leave out, but if you're a meat-eater and you want this to be more substantial, I would recommend baking a couple of chicken breasts (350 for 35 minutes), then dicing and adding to the salad after the chicken has been chilled.
Dijon Fruited Salad
Dressing (prepare and refrigerate overnight; I toss everything in a pint jar and shake vigorously):
1/2 c. sugar
1/3 c. lemon juice
2 T. Dijon mustard
1 T. poppy seeds
3/4 c. oil
1/2 t. salt
2 T. finely chopped red onion
Salad:
2 heads chopped romaine lettuce
2 unpeeled diced red apples
2 unpeeled diced pears (rinse diced fruit in lemon juice to prevent browning)
1 1/2 c. cashews
1 c. dried cranberries
1 c. shredded mozzarella (I generally leave this out these days...but it's really tasty. :-)
**2-3 diced avocadoes
**1 lb sliced strawberries
**not in original recipe but extremely tasty additions!!
Subscribe to:
Posts (Atom)